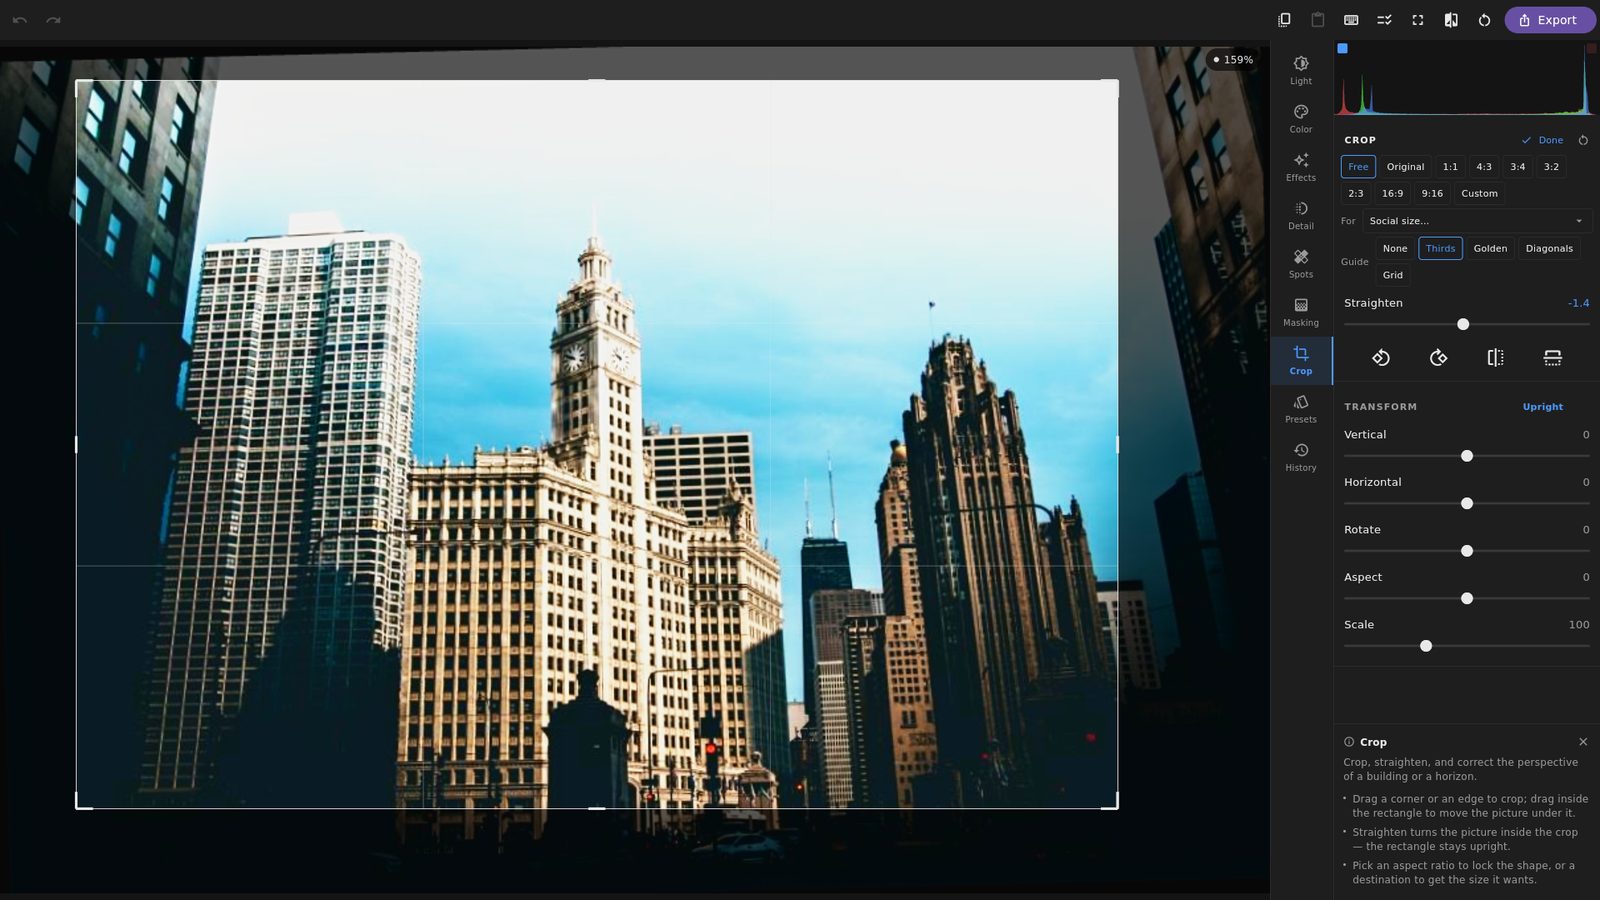
Cropping is the one edit that changes what the photograph is about, so it is worth more than the two seconds it usually gets.
The crop rectangle
Drag the edges or the corners; drag inside to move the picture under the frame. Aspect can be free, locked to the original, or locked to 1:1, 4:3, 3:4, 3:2, 2:3, 16:9 or 9:16. Custom takes a width and a height, either as a shape or as an exact size in pixels — 1080 by 1080 and 1:1 are the same shape and different intentions, and the difference shows the moment you paste the crop onto another photograph.
Guide overlays — thirds, golden ratio, diagonals, or a plain grid — are available while you drag and gone the moment you stop.
Crop for where it is going
Pick a destination and the crop is set to what it wants, in two taps and without knowing that an Instagram feed post is 1080 by 1440 this year: Instagram’s feed post, carousel slide and story, a TikTok photo slideshow, LinkedIn’s square and portrait documents, a Facebook link preview, a Pinterest pin. The sizes are the editor’s problem, not yours.
Where a destination keeps part of the frame for its own buttons and captions, that safe zone is drawn as a dashed rectangle inside the crop — a frame around what survives, not a tint over what gets covered, because those pixels are still exported. It is guidance while you work, and never part of the photograph.
If the photograph is smaller than the destination asks for, you get its shape instead of its size, and a line of text saying so. Labelling that crop “1000 × 1500” would be telling you that you have pixels you do not have.
Straighten, rotate, flip
Straighten is a fine angle for the horizon that is never quite level. Rotate is in quarter turns for a photograph that came off the camera sideways. Flip mirrors horizontally or vertically.
Perspective, and Upright
Point a camera up at a building and the verticals converge. That is not a mistake in the photograph, it is what a projection does — but it is rarely what you wanted.
Five controls correct it, and they are applied as a single projective transform rather than as five sequential warps:
- Vertical — the keystone from tilting up or down.
- Horizontal — the keystone from standing off to one side.
- Rotate — roll, in the transform rather than the crop.
- Aspect — anamorphic stretch, for undoing the horizontal compression a strong correction leaves behind.
- Scale — because correcting perspective always pushes some of the frame outside it.
They are applied together rather than one after another, which is what keeps the result believable: converging verticals come parallel and every other straight edge in the frame stays straight. Corrected one at a time, they fight each other and the picture starts to bend.
Upright does the analysis for you. It runs a Sobel edge detector and a bounded Hough transform over a small proxy of the image, finds the lines that ought to be parallel, and offers three answers: Level just fixes the horizon, Vertical fixes the converging verticals, and Full does both. Each is a proposal that lands in the same five sliders, so you can adjust it afterwards or undo it in one step.
Nothing is thrown away
None of this is applied to your file. The crop rectangle, the angles and the perspective values are all part of the edit, so the pixels outside the frame are still there. Come back a year later and the crop is a rectangle you can drag, not a decision that has already been made for you.
That also means you can crop hard for one purpose — a square for a print, a wide one for a banner — and go back to the full frame afterwards without having kept a second copy of anything.