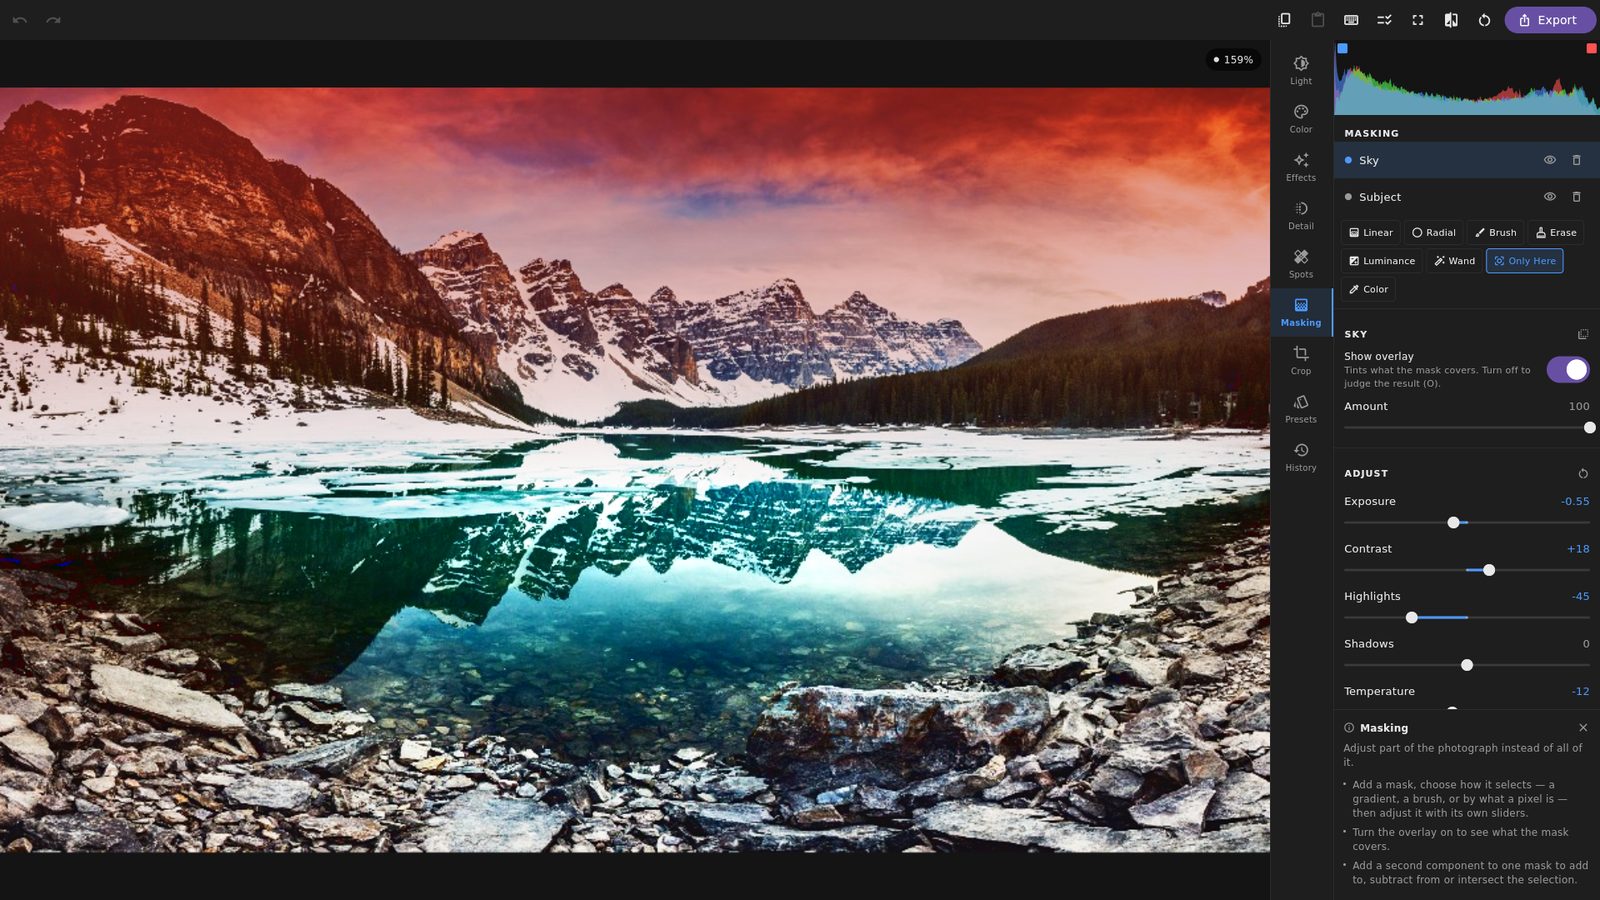
A global adjustment treats the sky and the subject as the same problem. They almost never are. Masking is how you say this part, and then edit only that part.
The mask types
Linear gradient — a soft transition along a direction you drag. This is the digital graduated filter: darken a sky from the top down, or add warmth from the left where the sun was.
Radial gradient — an ellipse with a feathered edge, rotatable, and invertible. Used on a face, a window, or anything you want to lift out of its surroundings.
Brush — paint coverage directly, with size, feather and flow. Erase is the same brush subtracting instead of adding, which is how you fix the edges of any of the others.
Luminance range — select by brightness. “Everything darker than this” is a genuinely useful selection, and it follows the picture: it stays correct when the subject moves, because it was never a shape in the first place.
Colour range — select by colour. Pick a hue and a tolerance and every pixel near it is selected, wherever it is in the frame.
Wand — point at it. Tap the sky and the sky is selected. Every other mask asks you to describe what you want; this one asks you to show it, which is the only input anybody really has about their own photograph.
The wand
By default the wand takes only here: it grows outwards from where you tapped and stops where the picture changes, so tapping a sky takes the sky and stops at the horizon, and a blue car in the street below is left alone. Switch Only Here off and it takes every pixel in the frame that looks like the one you pointed at, wherever it is.
Two sliders shape it, and moving either re-runs the selection from the same point rather than asking you to tap again.
- Tolerance is how different a pixel can be and still count.
- Brightness is how much a difference in brightness counts against a match. On a photograph, a change of colour usually means a different object, while a change of brightness usually means the same object in shade. At 0 the wand follows a green field down into its own shadow; at 100 it stops where the light does.
A contiguous selection is computed once, from this photograph’s own edges, and kept in the edit — a sky costs a few bytes, and it is enlarged to whatever size the export needs. What it cannot do is mean anything on a different photograph, so when you copy settings to another picture the Masking group is disabled with the reason written underneath, rather than pasting a sky-shaped hole onto somebody’s portrait.
Components combine
A mask is a list of components, and each one is added to, subtracted from, or intersected with what came before. That is what makes the useful selections possible:
- A linear gradient over the sky, intersected with a luminance range, gives you the bright part of the sky only — and leaves the dark treeline alone even though the gradient covers it.
- A radial gradient on a face, minus a brush stroke over the hair, is a skin selection you can build in about four seconds.
- Two radial gradients added together handle two subjects at once with one set of sliders.
Any mask can also be inverted whole, which is how “everything except this” gets written.
Each mask carries its own adjustments
A mask is not a selection you then apply one filter through. It holds a complete adjustment stack — light, colour, curves, effects, detail — with its own opacity and its own visibility toggle. Two masks with opposite exposure adjustments are a perfectly ordinary way to work.
The red overlay
Turn the overlay on and the selected mask’s coverage is drawn over the photograph in red, so you can see exactly what you have selected rather than inferring it from the result. Turn it off, or deselect, and the overlay goes; the mask keeps working.
Crucially, that selection is tool state, not document state. Which mask you happen to have highlighted is not part of the photograph, so it never reaches the saved document, the undo stack, or an exported file.
The brush, in practice
Size, feather and flow are the three controls, and feather is the one that matters most. A hard-edged brush shows its own outline in the result the moment the adjustment is strong; a feathered one blends into what surrounds it, so nobody can tell where you painted.
Build coverage in several light passes rather than one heavy one — with flow below 100 the strokes accumulate, which gives you far more control over where a local adjustment fades out than trying to place a single perfect stroke.